10 shot placement examples
Introduction
In this article, you'll get shot placement details for ten scenarios.
And you'll learn to apply the rules I shared in our main shot placement post.

Let me just say that all of the scenarios are out of season.
And a few of them don't qualify as safe shooting.
Please ignore that.
We use the images exclusively to discuss correct shot placement.
Let's get to it.
Example 1 - broadside shot
Here's a perfect broadside shot.

You can apply the vital zone triangle and use the center of the triangle as your aiming point for a double lung shot.

Remember the shot placement rules.
Rule two states you should put your crosshairs between 1/3 and 1/2 up the body.

And rule three states that you should put your vertical post on the middle of the front leg for a broadside shot.

So that's where you put your crosshairs.

This is a perfect broadside shot, but we rarely get the luxury of such a shot.
Example 2 - broadside, step forward
Here, the animal has taken a step forward to feed off the willow shoots.
The first thing to notice is that the horizontal line through the middle of the leg no longer works as a reference point. Because the leg is too far forward.

What about the vital triangle?
When you draw it on the near side, you must remember the bone structure has moved forward.
You can compare it with the same triangle further back, more aligned with the far leg.

You can split the difference for a shot like this, where each leg is roughly the same amount forward and back.
And put your crosshairs in the middle, where the legs meet.

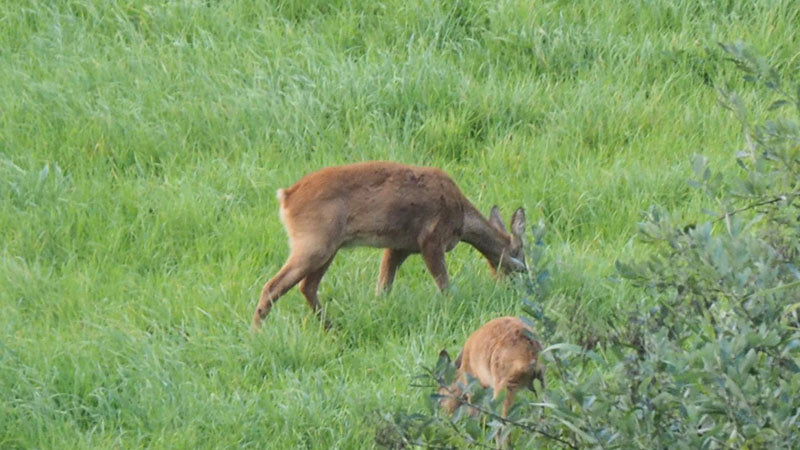
Example 3 - broadside, hunched over
Here's an image of a roe doe feeding.
She's kind of bunched up, but the triangle still applies. And the aiming point is roughly around here.

So your sight picture would look like this.

I would, however, recommend waiting till she pauses to look around.
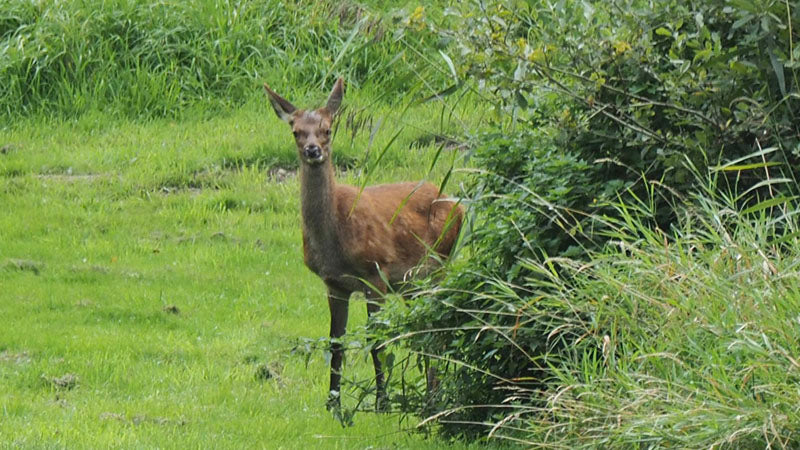
Example 4
As she does here.

This way, it's a little easier to navigate on the body.
And you can follow rule two and come up between 1/3 and 1/2 the body.
Again, the legs are split, so aim between them.
Still between 1/3 and 1/2 up the body.

Example 5 - broadside, step forward
Remember image two?
Here's the opposite scenario.
The near leg is back, and the far leg is forward.
Here's the aiming point for a broadside shot with straight legs.

But you need to adjust for the difference between the two sides.
It's worth noting that the far leg is further forward than the near leg is to the rear.
So I suggest you don't split the difference completely.
Put your aiming point here.

And your crosshairs on top.

Example 6 - rear-quartering shot
Here's a rear-quartering shot.
Rule six states you need to aim just inside the far leg for a 45-degree rear quartering shot.
This one looks slightly more than 45 degrees, but not so much that I would deviate from the rule.
Word of caution.
Rule five states you shouldn't shoot beyond 45 degrees from a square broadside shot.
That's to avoid contaminating the carcass.
And to avoid insufficient penetration when shooting on large-bodied animals.
In this case, it looks like we're only a fraction past 45 degrees, so if it's a short distance where we expect high accuracy, I'd be happy to take the shot.
This is the aiming point.

Put your crosshairs right on top.

Animals don't always quarter perfectly at 45 degrees.
How do you apply rules four and six in those cases?
Example 7 - shallow rear-quartering
Here's one of those examples.
The animal is not broadside, but it's also not quartering at 45 degrees.
So, instead of aiming inside the far leg as per rule six, I suggest you aim mid-way between the legs.

Now we've covered the rear-quartering shot. What about front-quartering?
Example 8 - front-quartering shot
This is a front quartering shot.
And rule number four states you must aim inside the near leg for a 45-degree front quartering shot.
This is a little past 45 degrees.
According to rule five, we shouldn't take the shot because we're starting to only damage one lung.
But it's a borderline case, so I'd adjust my aiming point slightly and shoot the deer.
Here's the aiming point for a 45-degree shot.

We'll change it slightly to adjust for the steeper angle.

So your sight picture should look like this.

Example 9 - front shot
Here's a straight-on front shot.

And rule number five definitely applies here.
The aiming point is small.
You're likely to only destroy one lung.
You will likely contaminate the carcass when shooting a small deer like this.
And if the animal drops its head to feed, you will likely wound it.
I recommend you don't take this shot unless you have already wounded the animal.

Example 10 - rear shot
What about the opposite end?

The same rule and conditions apply.
In this case, the animal is at a slight angle.
As I explained in the main article on the shot placement scenarios and rules, I suggest you don't take this shot unless you've wounded the animal.

Summary
This was just a quick review of shot angles.
If you haven't already watched the main shot placement article, I suggest doing so.
You'll get nine rules, 11 scenarios, and 18 diagrams to set you up for success.
There are many other factors when killing a deer or other hoofed animal.
We'll keep adding posts, and I suggest you sign up for our newsletter if you want to be notified.
Click here to sign up.